
Airfix 1/48 Scale Hawker Hunter
For this kit I purchased some aftermarket items
RESKIT nozzles
Quinta studios 3D printed cockpit decals
The crafting well paint mass
Resin cockpit seat
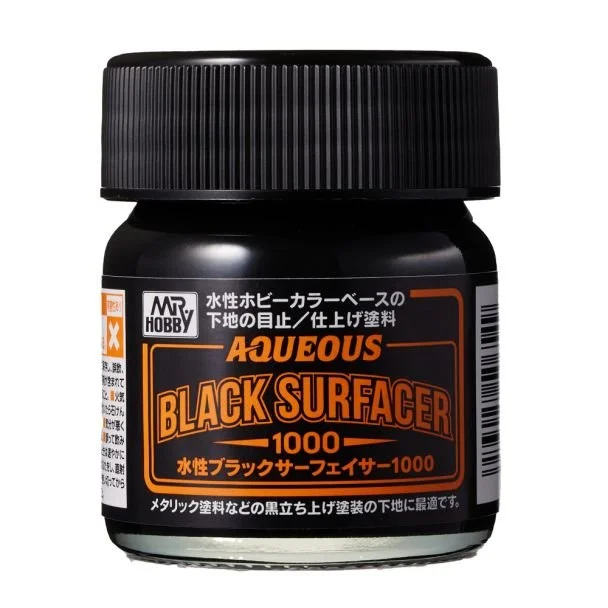
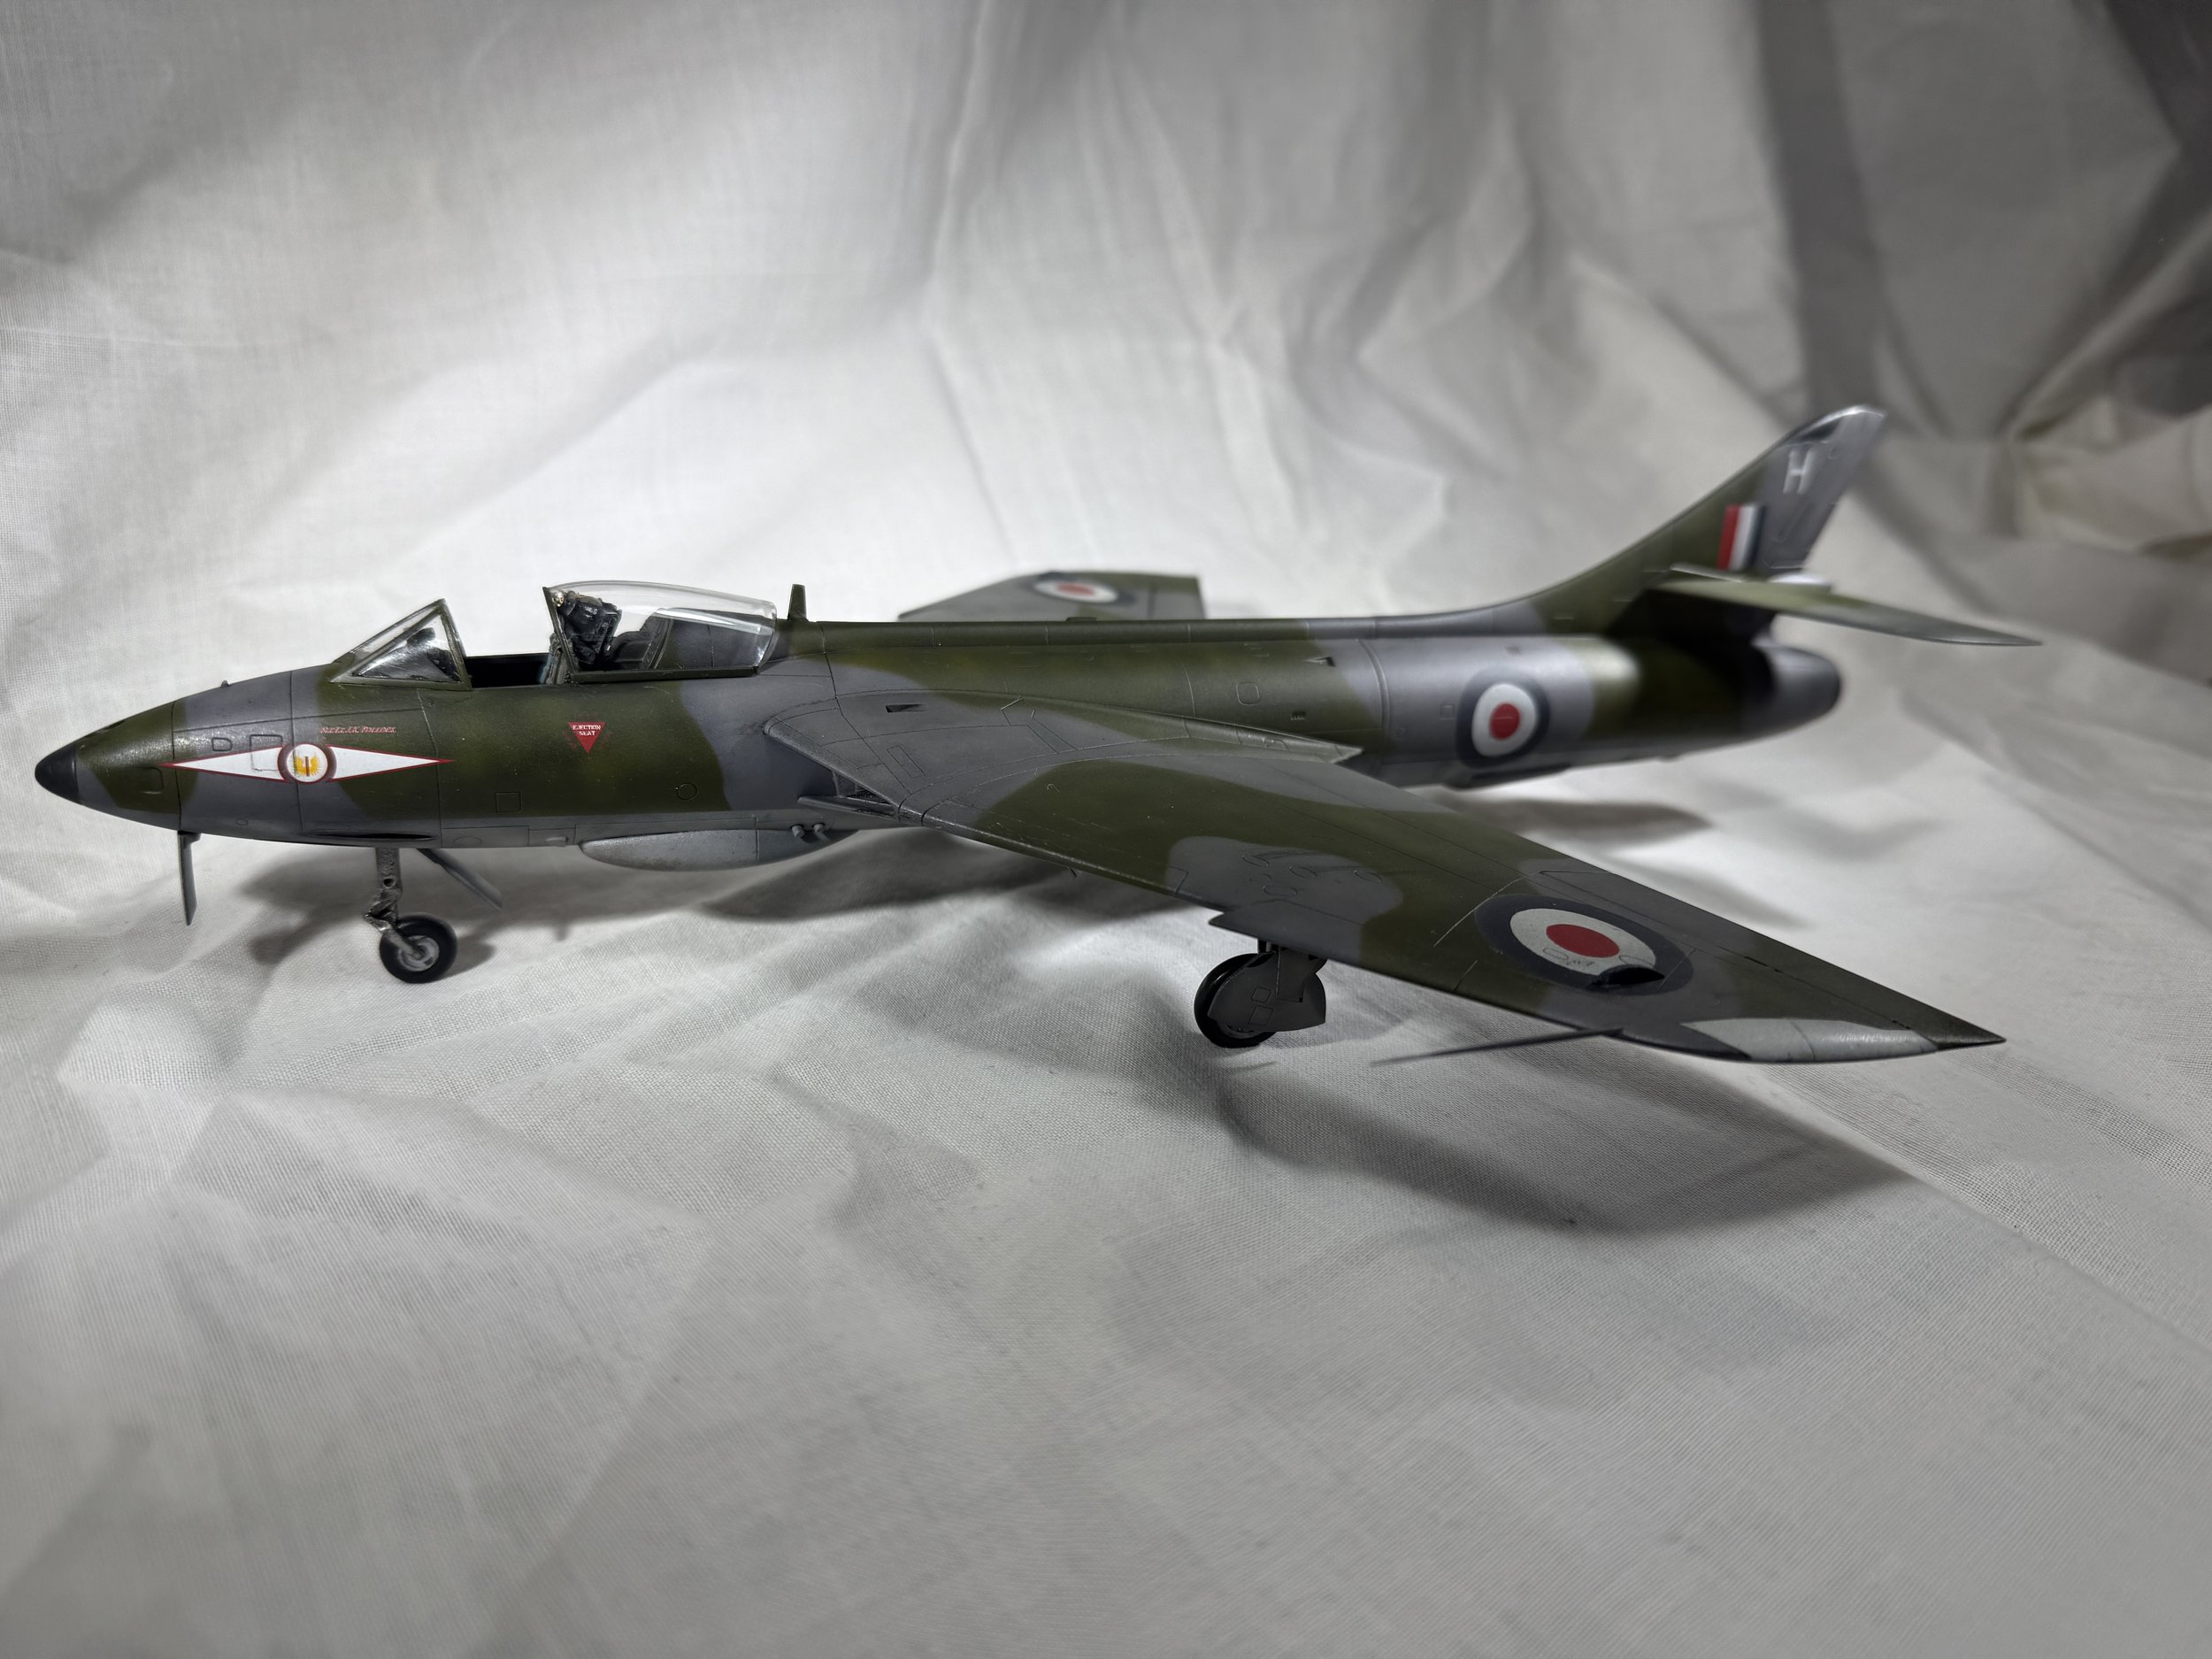
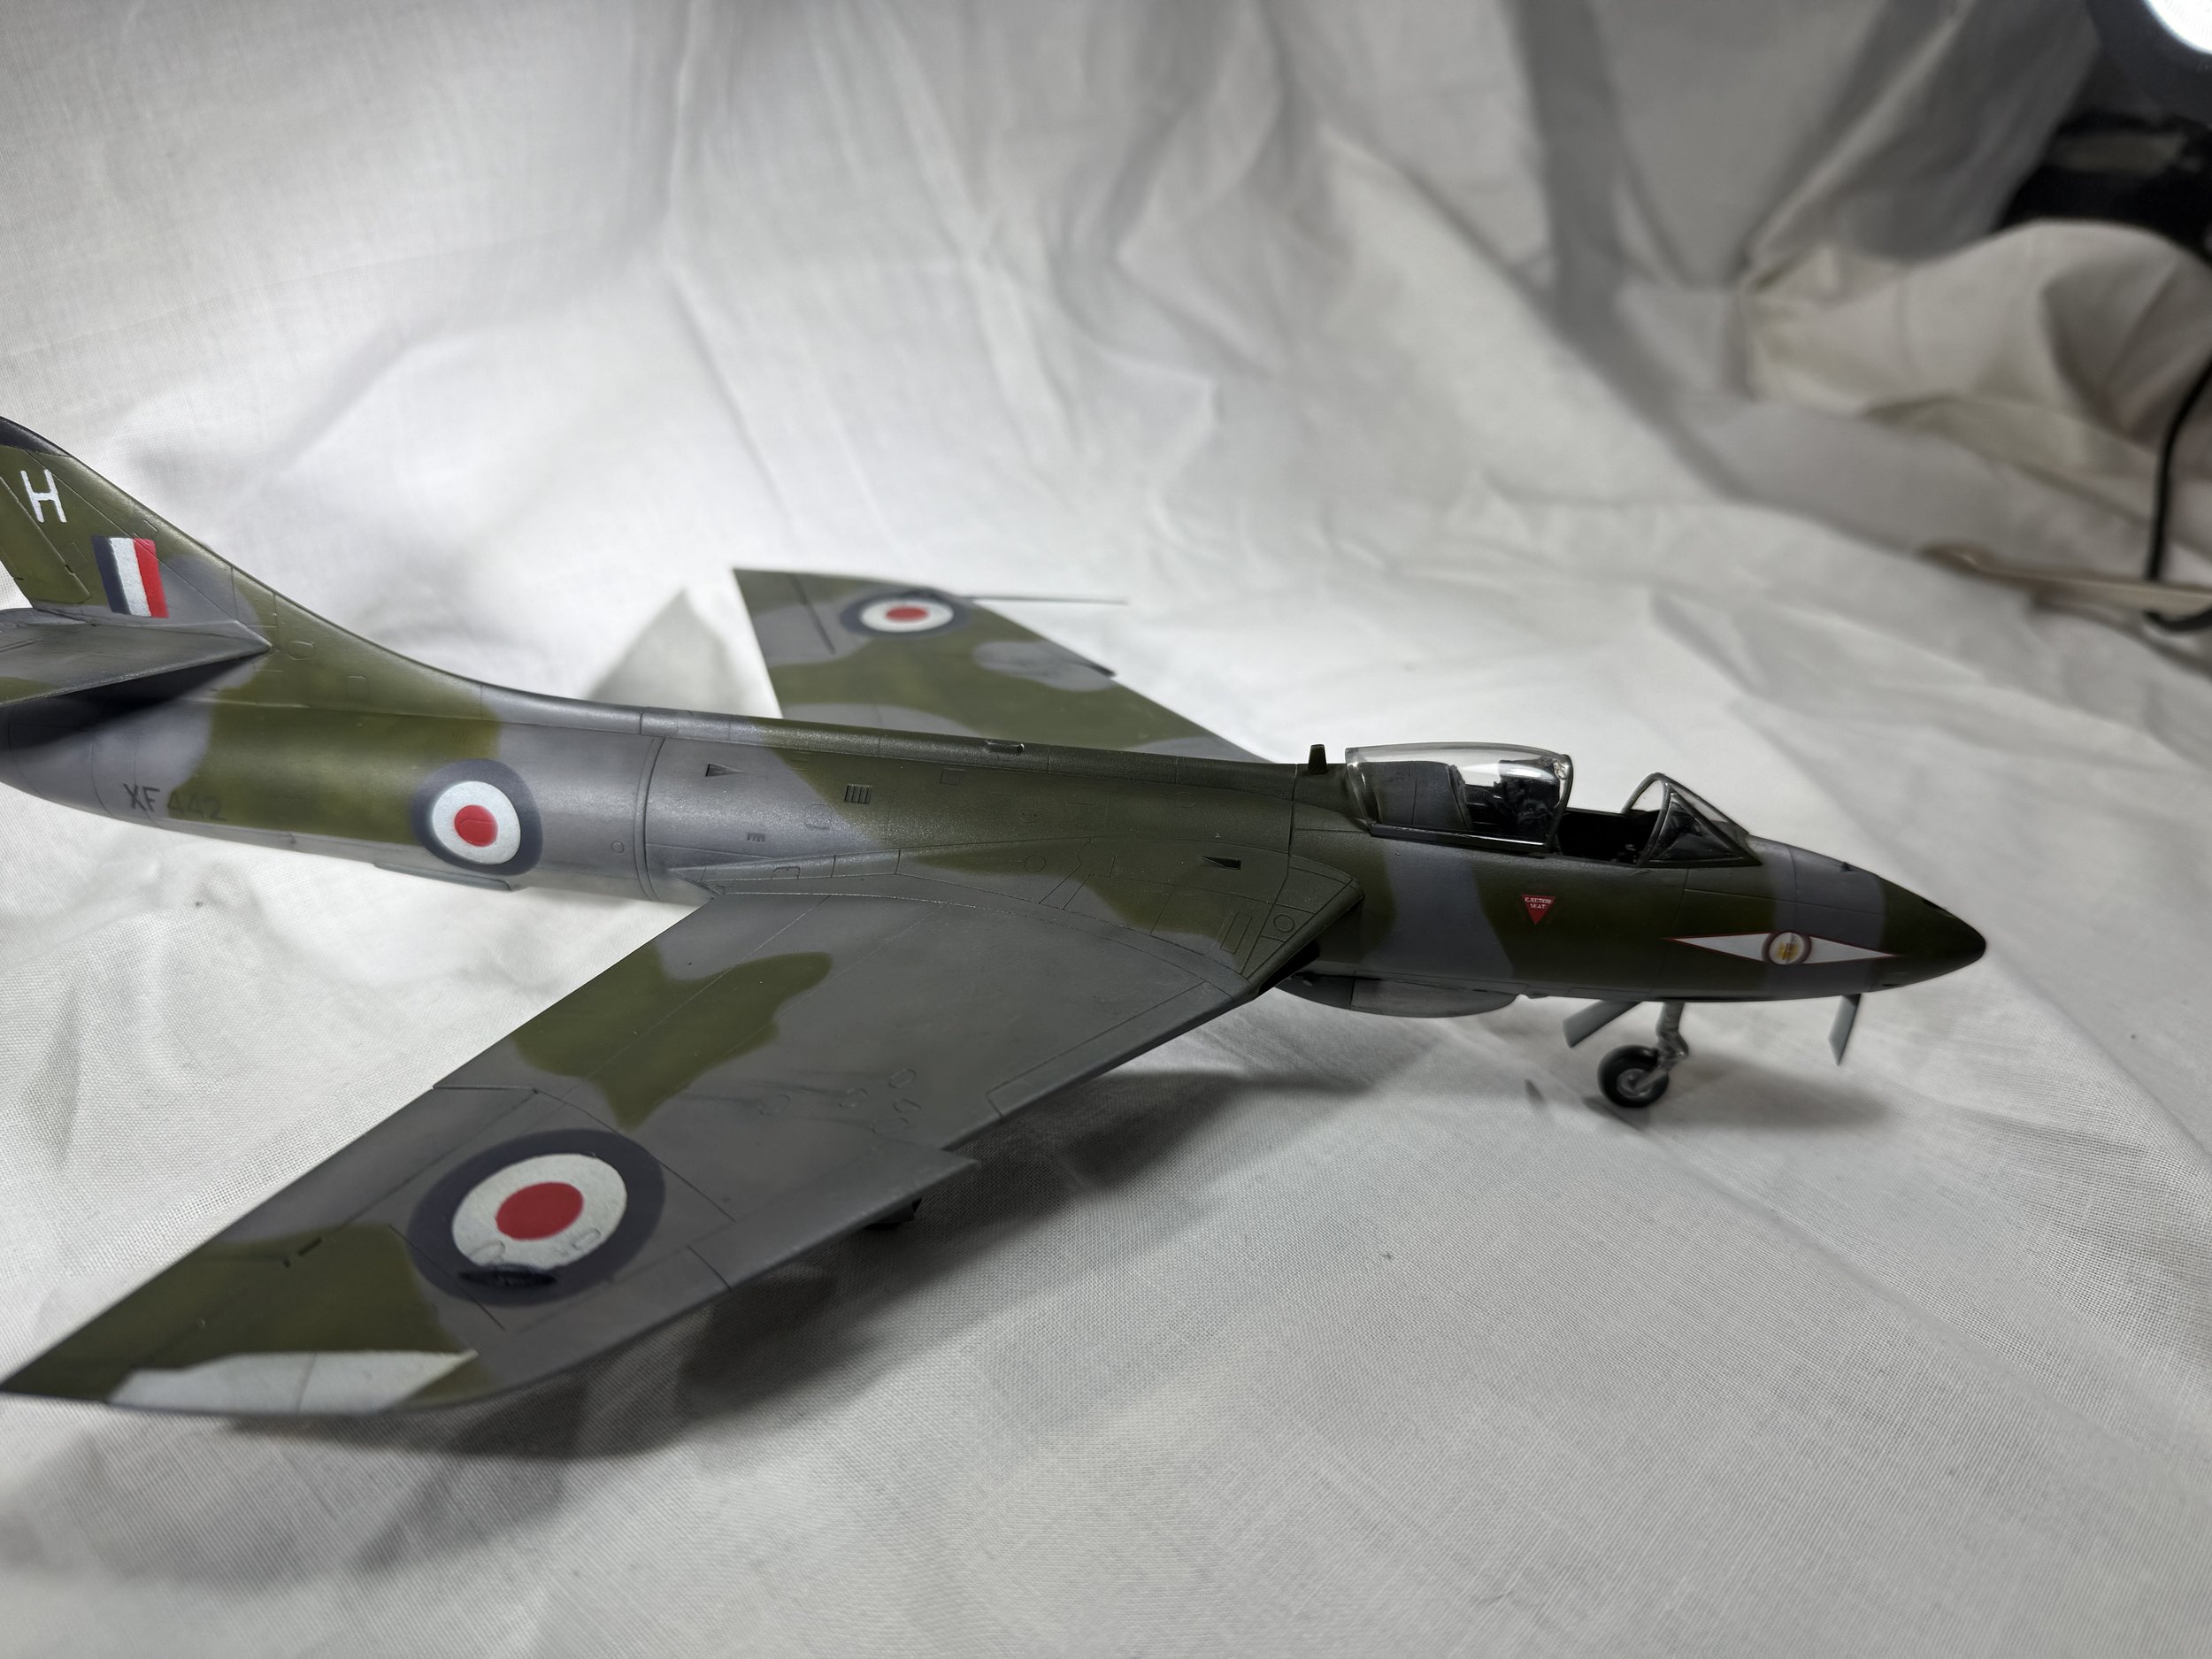
The build started with the cockpit as per normal, this is a fairly simple affair in the hunter with not much to it really. My first job once I had cut everything off the runners was to sand off all the raised detail. Once this was done, I could then paint the cockpit, I first sprayed the cockpit with primer, for this I used Mr hobby aqueous black surface primer 1000. After that was dry it was time to paint the cockpit with Mr hubby aqueous H335.
Once this was dry, I sprayed a gloss coat and added a grime wash. For this I used Oils by AK interactive called Starship filth, once I had applied the oils, I then removed them with some odourless thinners. After this had dried, I placed a matt coat varnish on ready to add the 3D decals. The Quinta Studios 3D Printed Cockpit Decals were easy to use, first I placed them in water for about 10 seconds to loosen them from the backing paper, after this occurred, I carefully lifted them out of the water and Ieft them to dry on a paper towel. While this was happening, I placed some PVA glue on the parts where these decals would go, and hey presto instant cockpit dashboard and over parts.
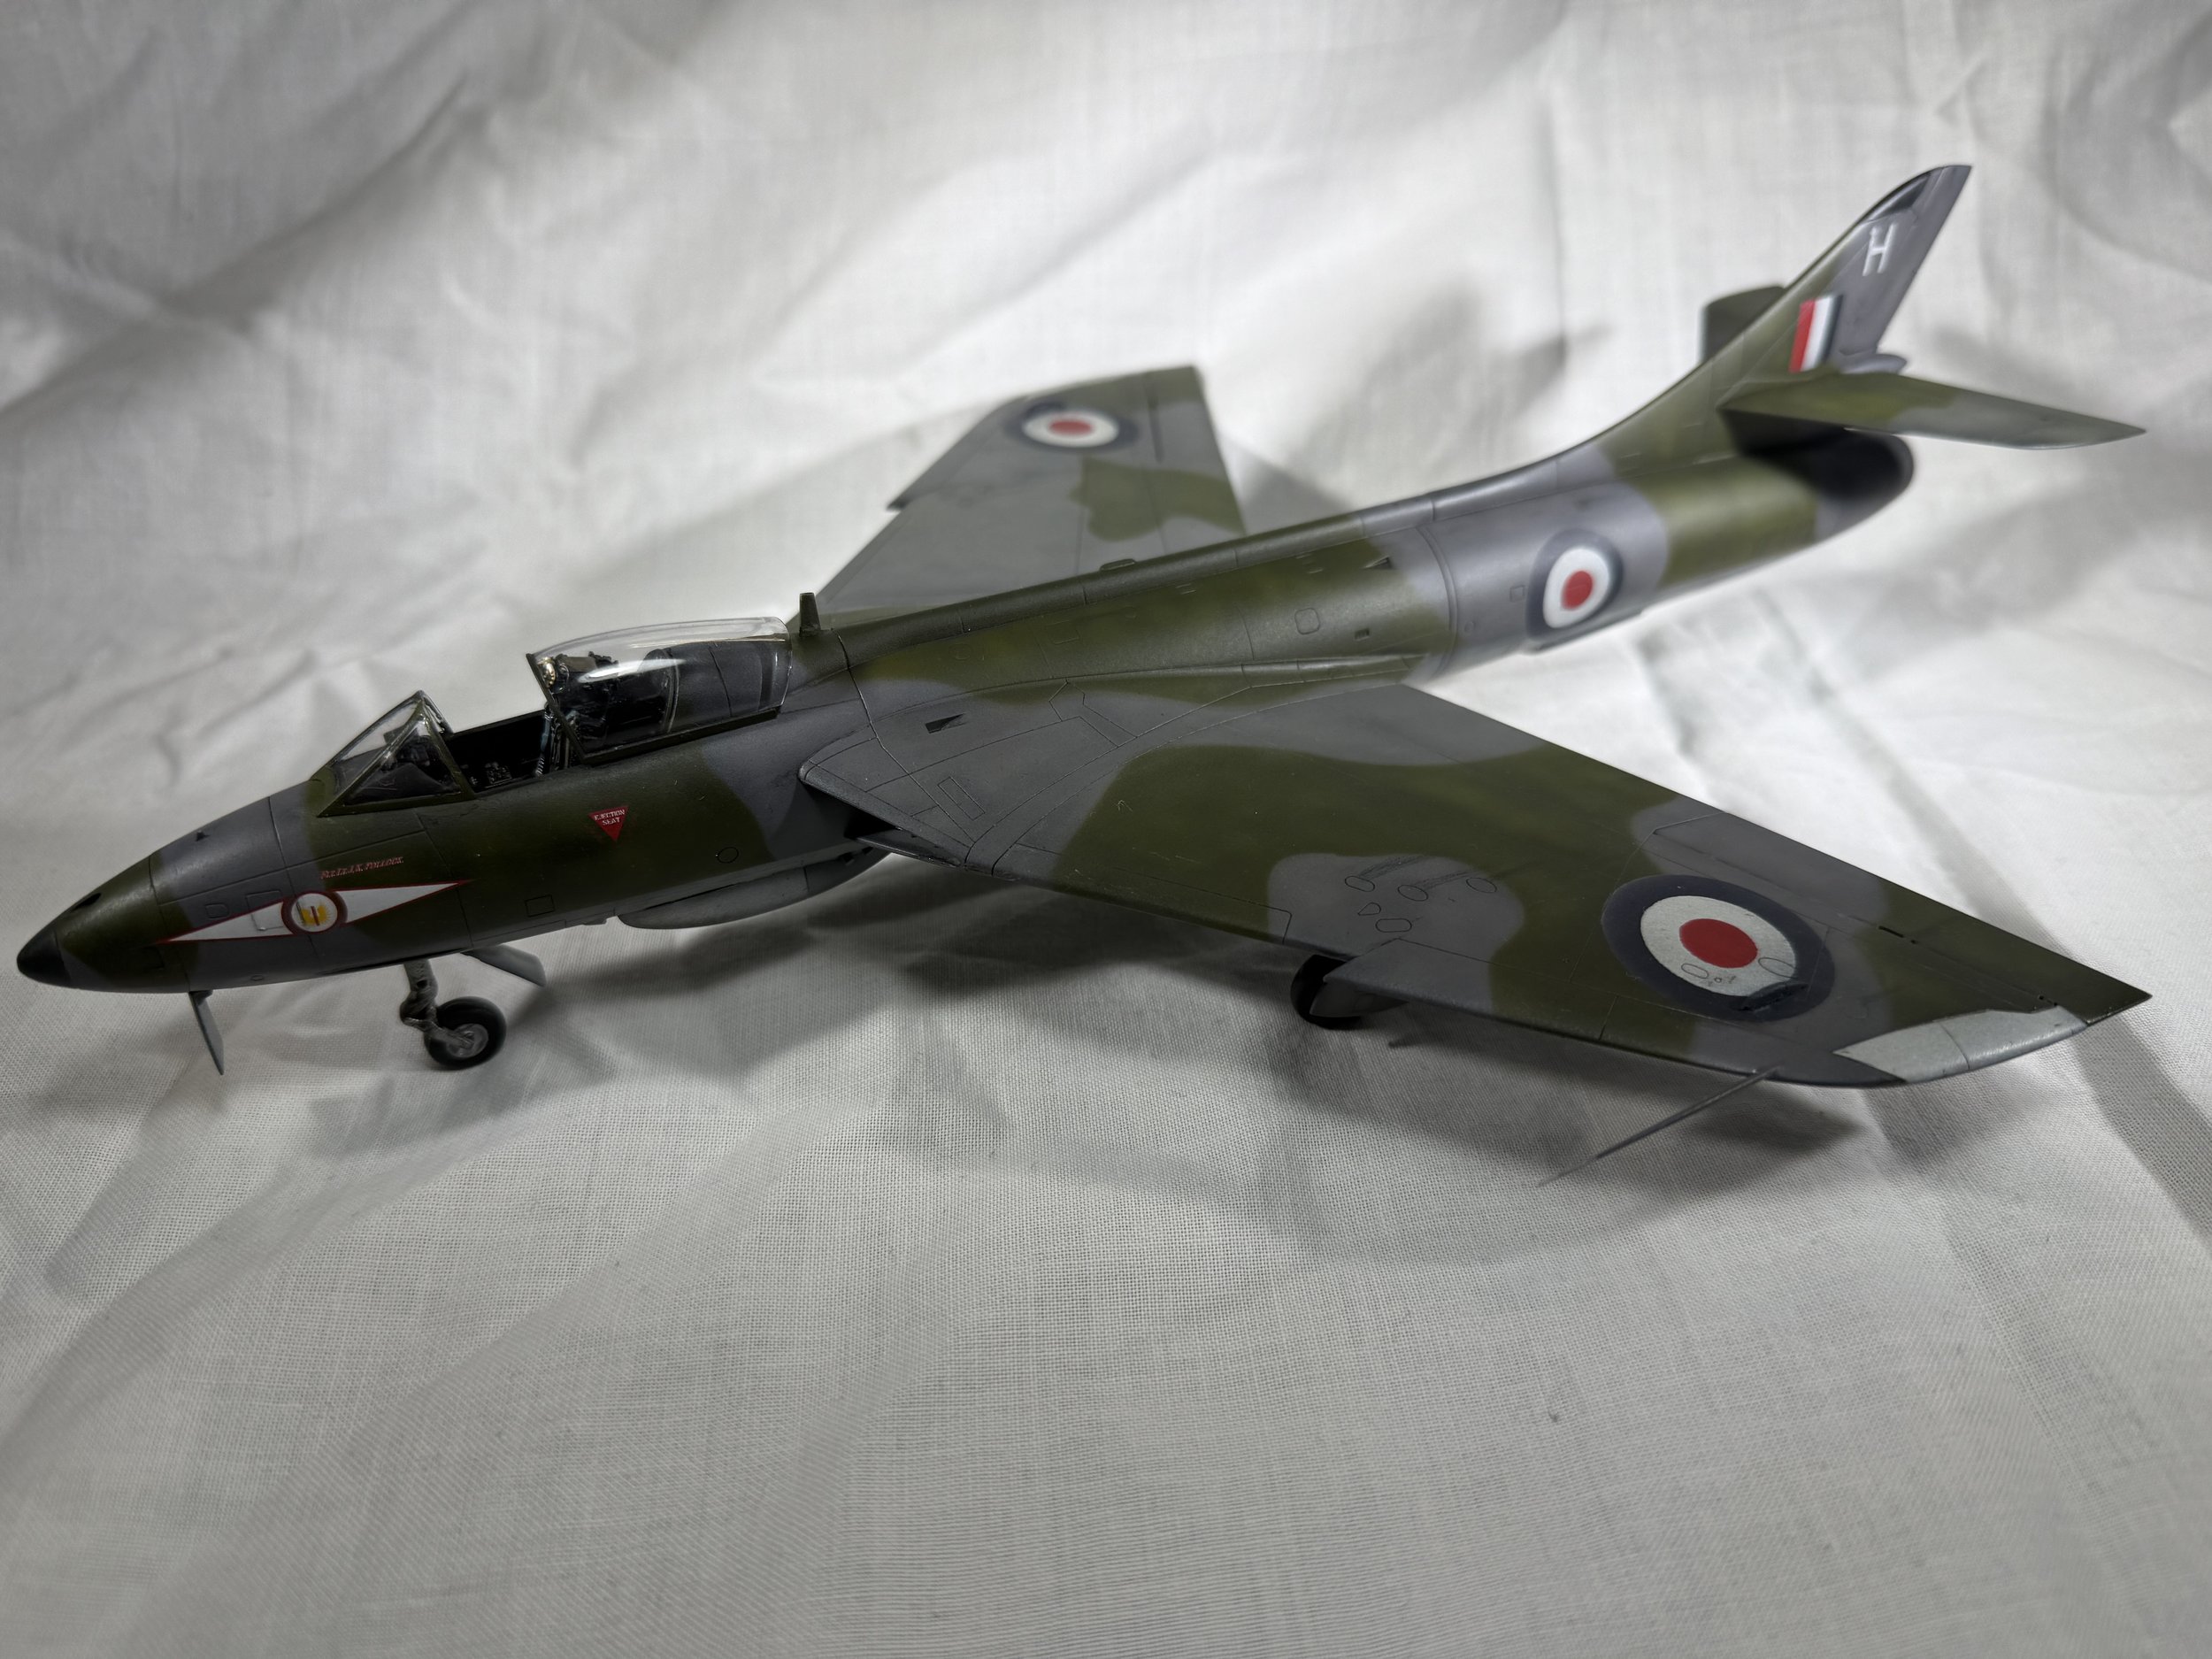
Whilst I was doing this, I got the resin cockpit seat ready, the detail was miles better than the kit supplied version, I again painted this with Mr hobby aqueous paints H33, H81. Once painting was complete, a gloss coat wash and then a Matt coat was sprayed on top of that. Finally, the 3D printed decals were added.


I also built the engine nozzle at this point removing it from the casting blocks, priming and then painting it steel and jet exhaust colours from the Vallejo metal colour range. There's some lovely detail in this engine set, but it can't be seen once the models put together. Now everything was painted it was time to put it all together inside the fuselage. This generally went together well though I forgot later to add extra weight in the nose to take into consideration added weight of the jet nozzle but more on that later.
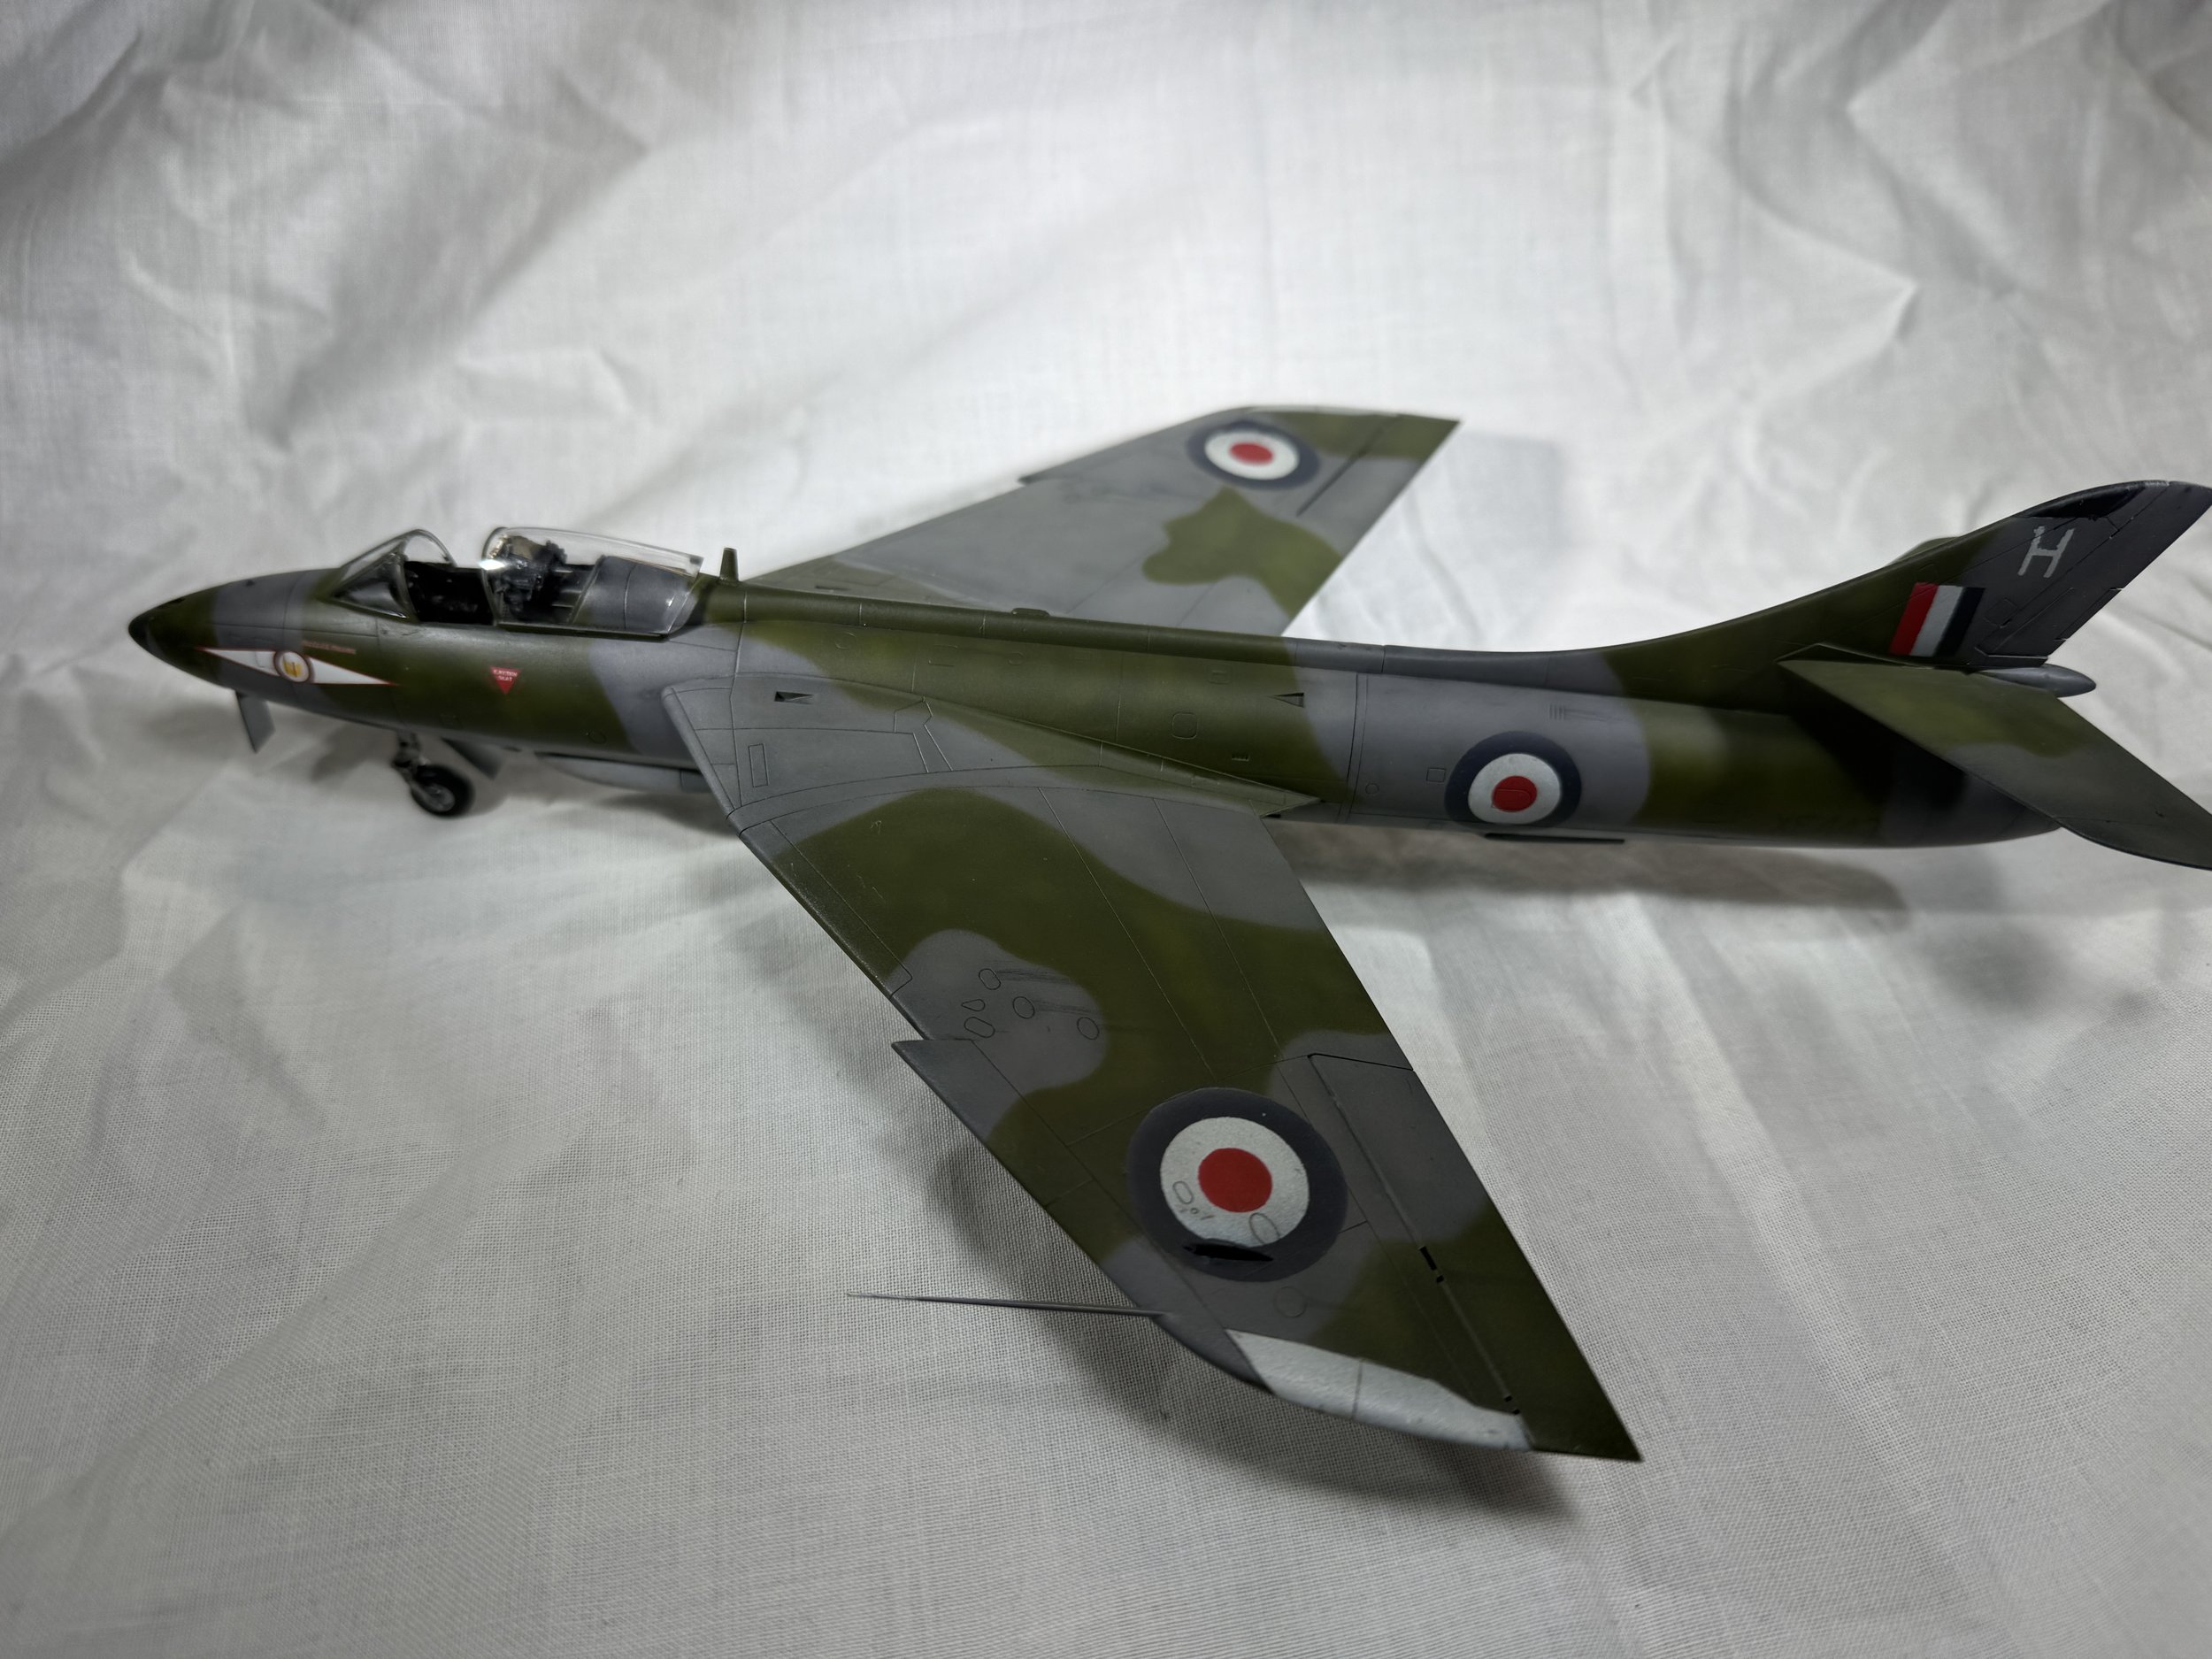
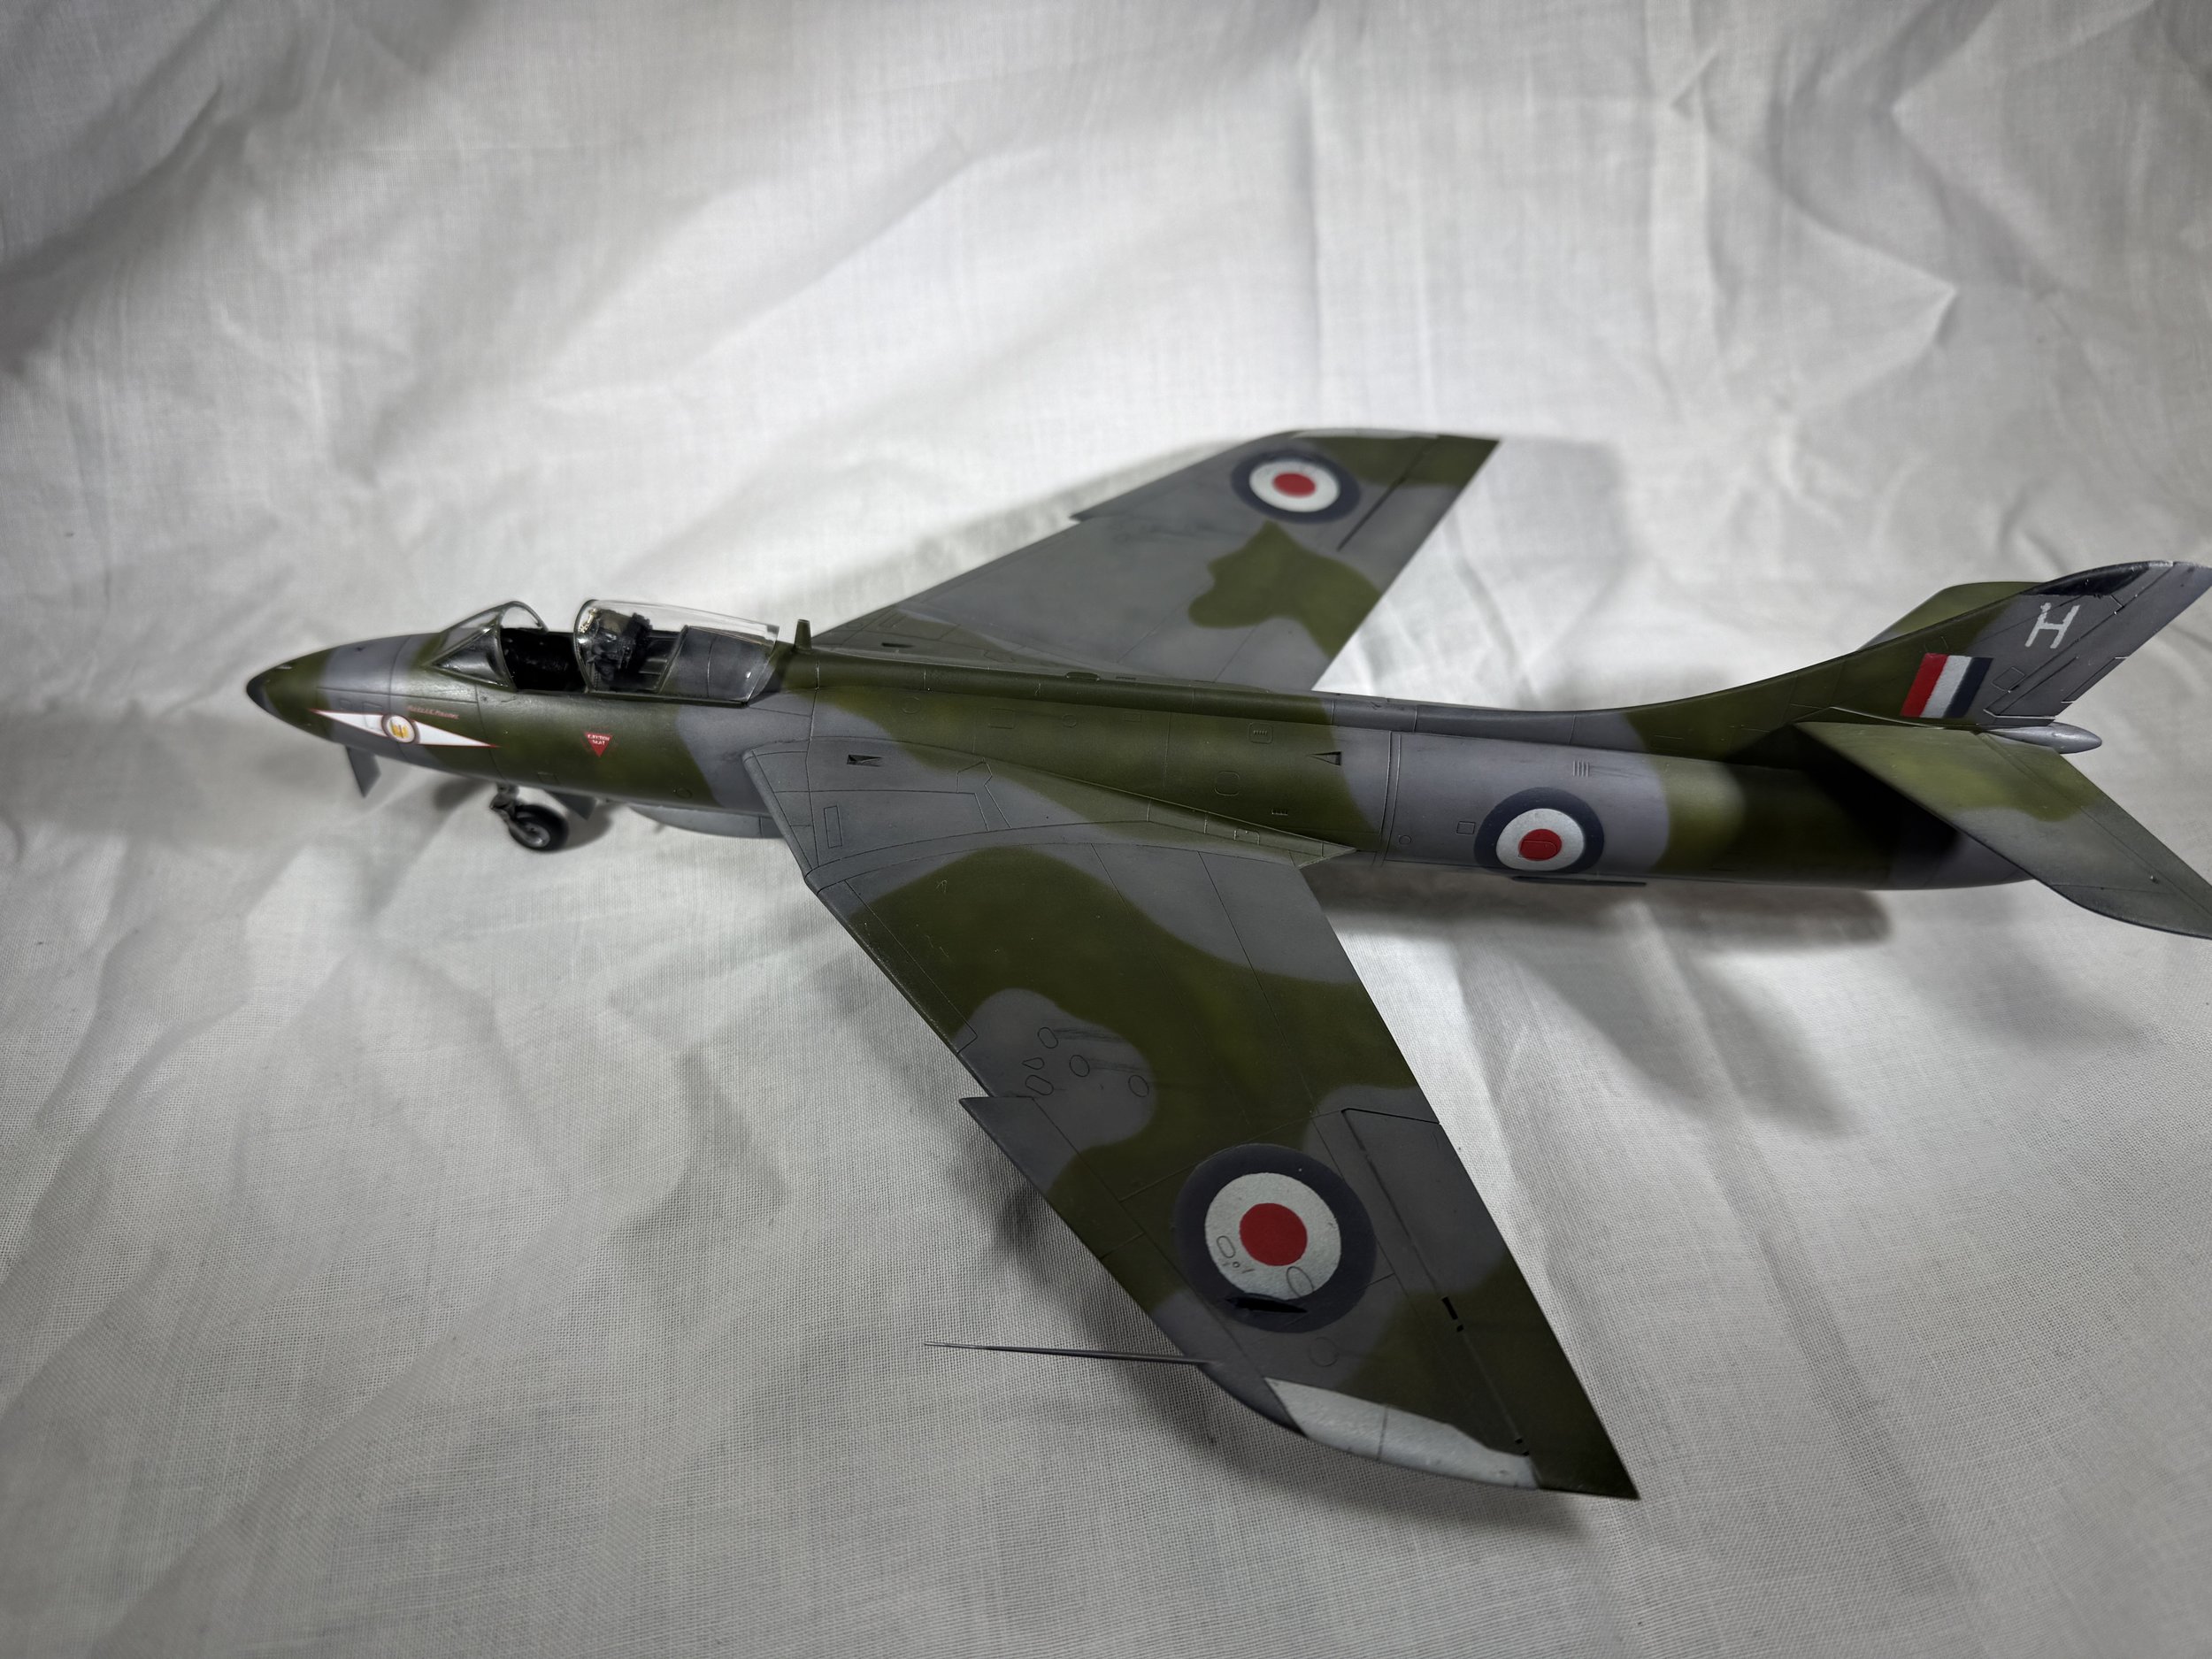
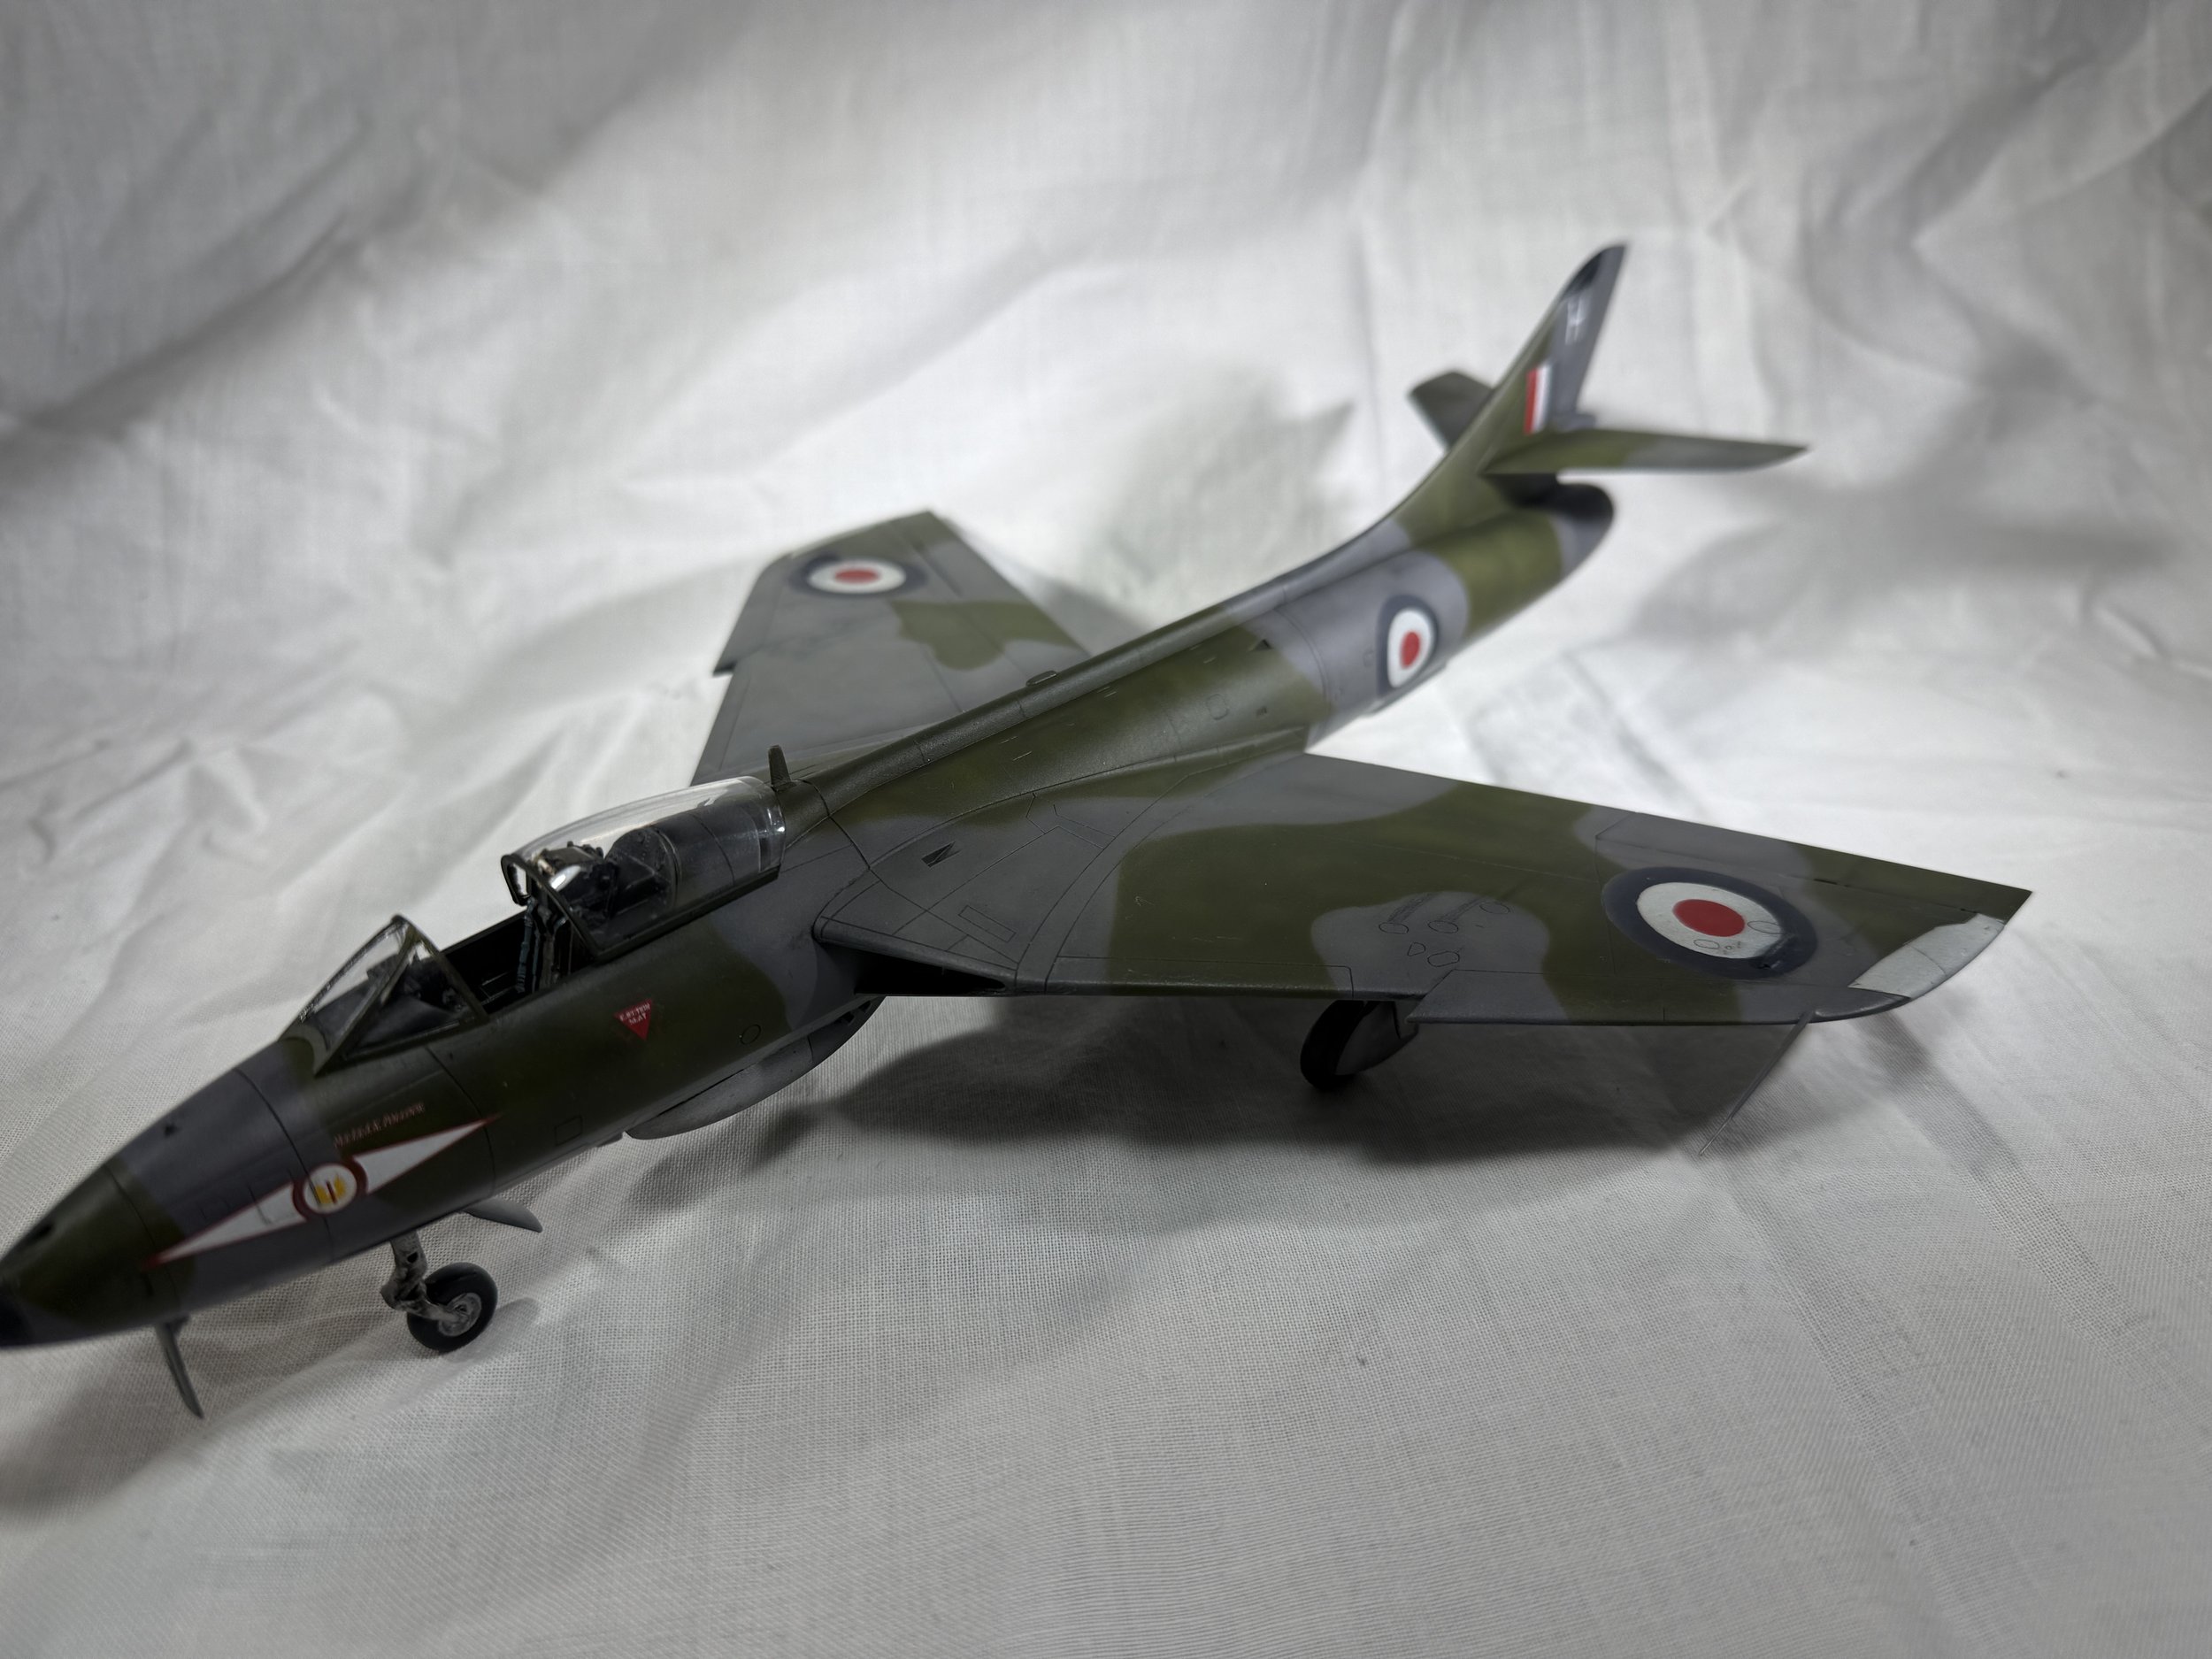
Next up were the fuselage halves which went together easily, the only issue I had with this, was that the back quarter (where the tail is), didn't fit that well. I overcame this with some filling and sanding around this area. The wings sandwiched the wheel wells really well so there were no issues here. Next, I joined the wings to the fuselage and this fitted together perfectly, this meant that the aircraft actually came together really quickly.
Once the aircraft was together, I sanded all the seam lines and re-scribed the panel lines where needed, there's not any rivet detail on this kit so I wasn’t required to re-scribe those. The next step was priming the aircraft again using Mr hobby aqueous 1000 black primer. I like to use this Mr Hobby primer as this goes on really well with my 0.4-millimetre needle cheap airbrush. I mix this with Mr hobby Aquarius 400 thinner which gives silky smooth finish which self-levels, I would highly recommend it trying it.
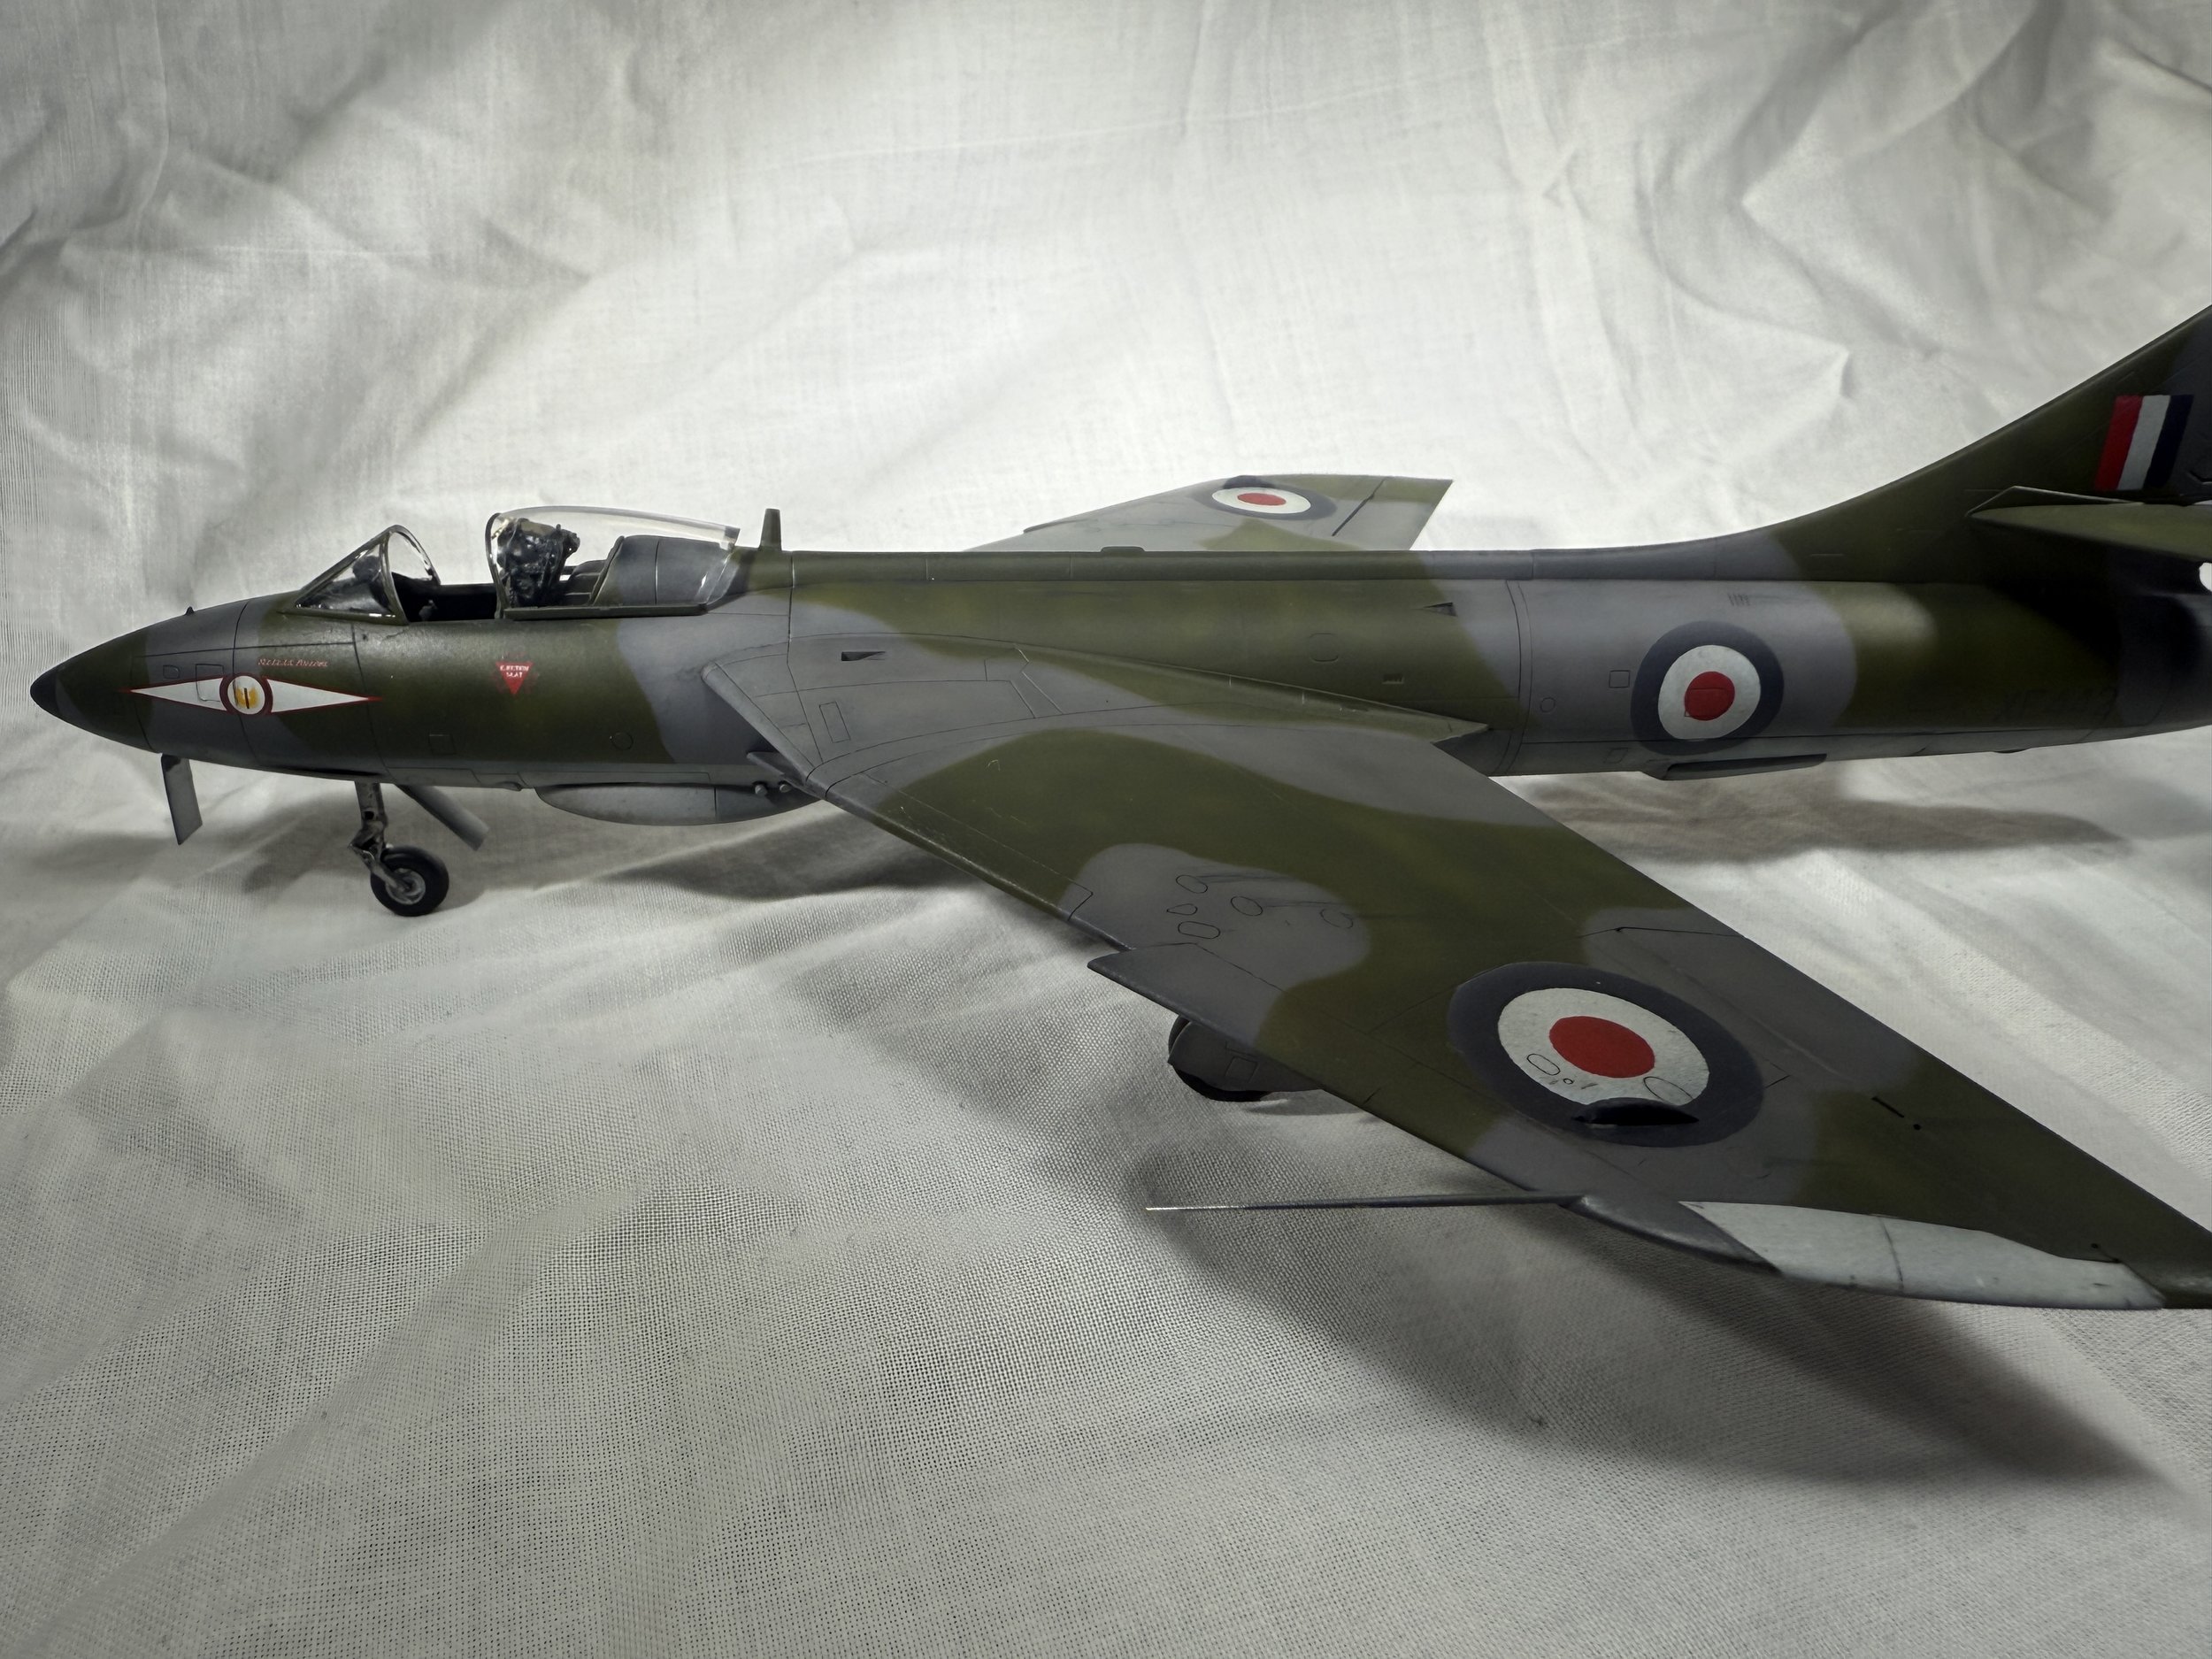
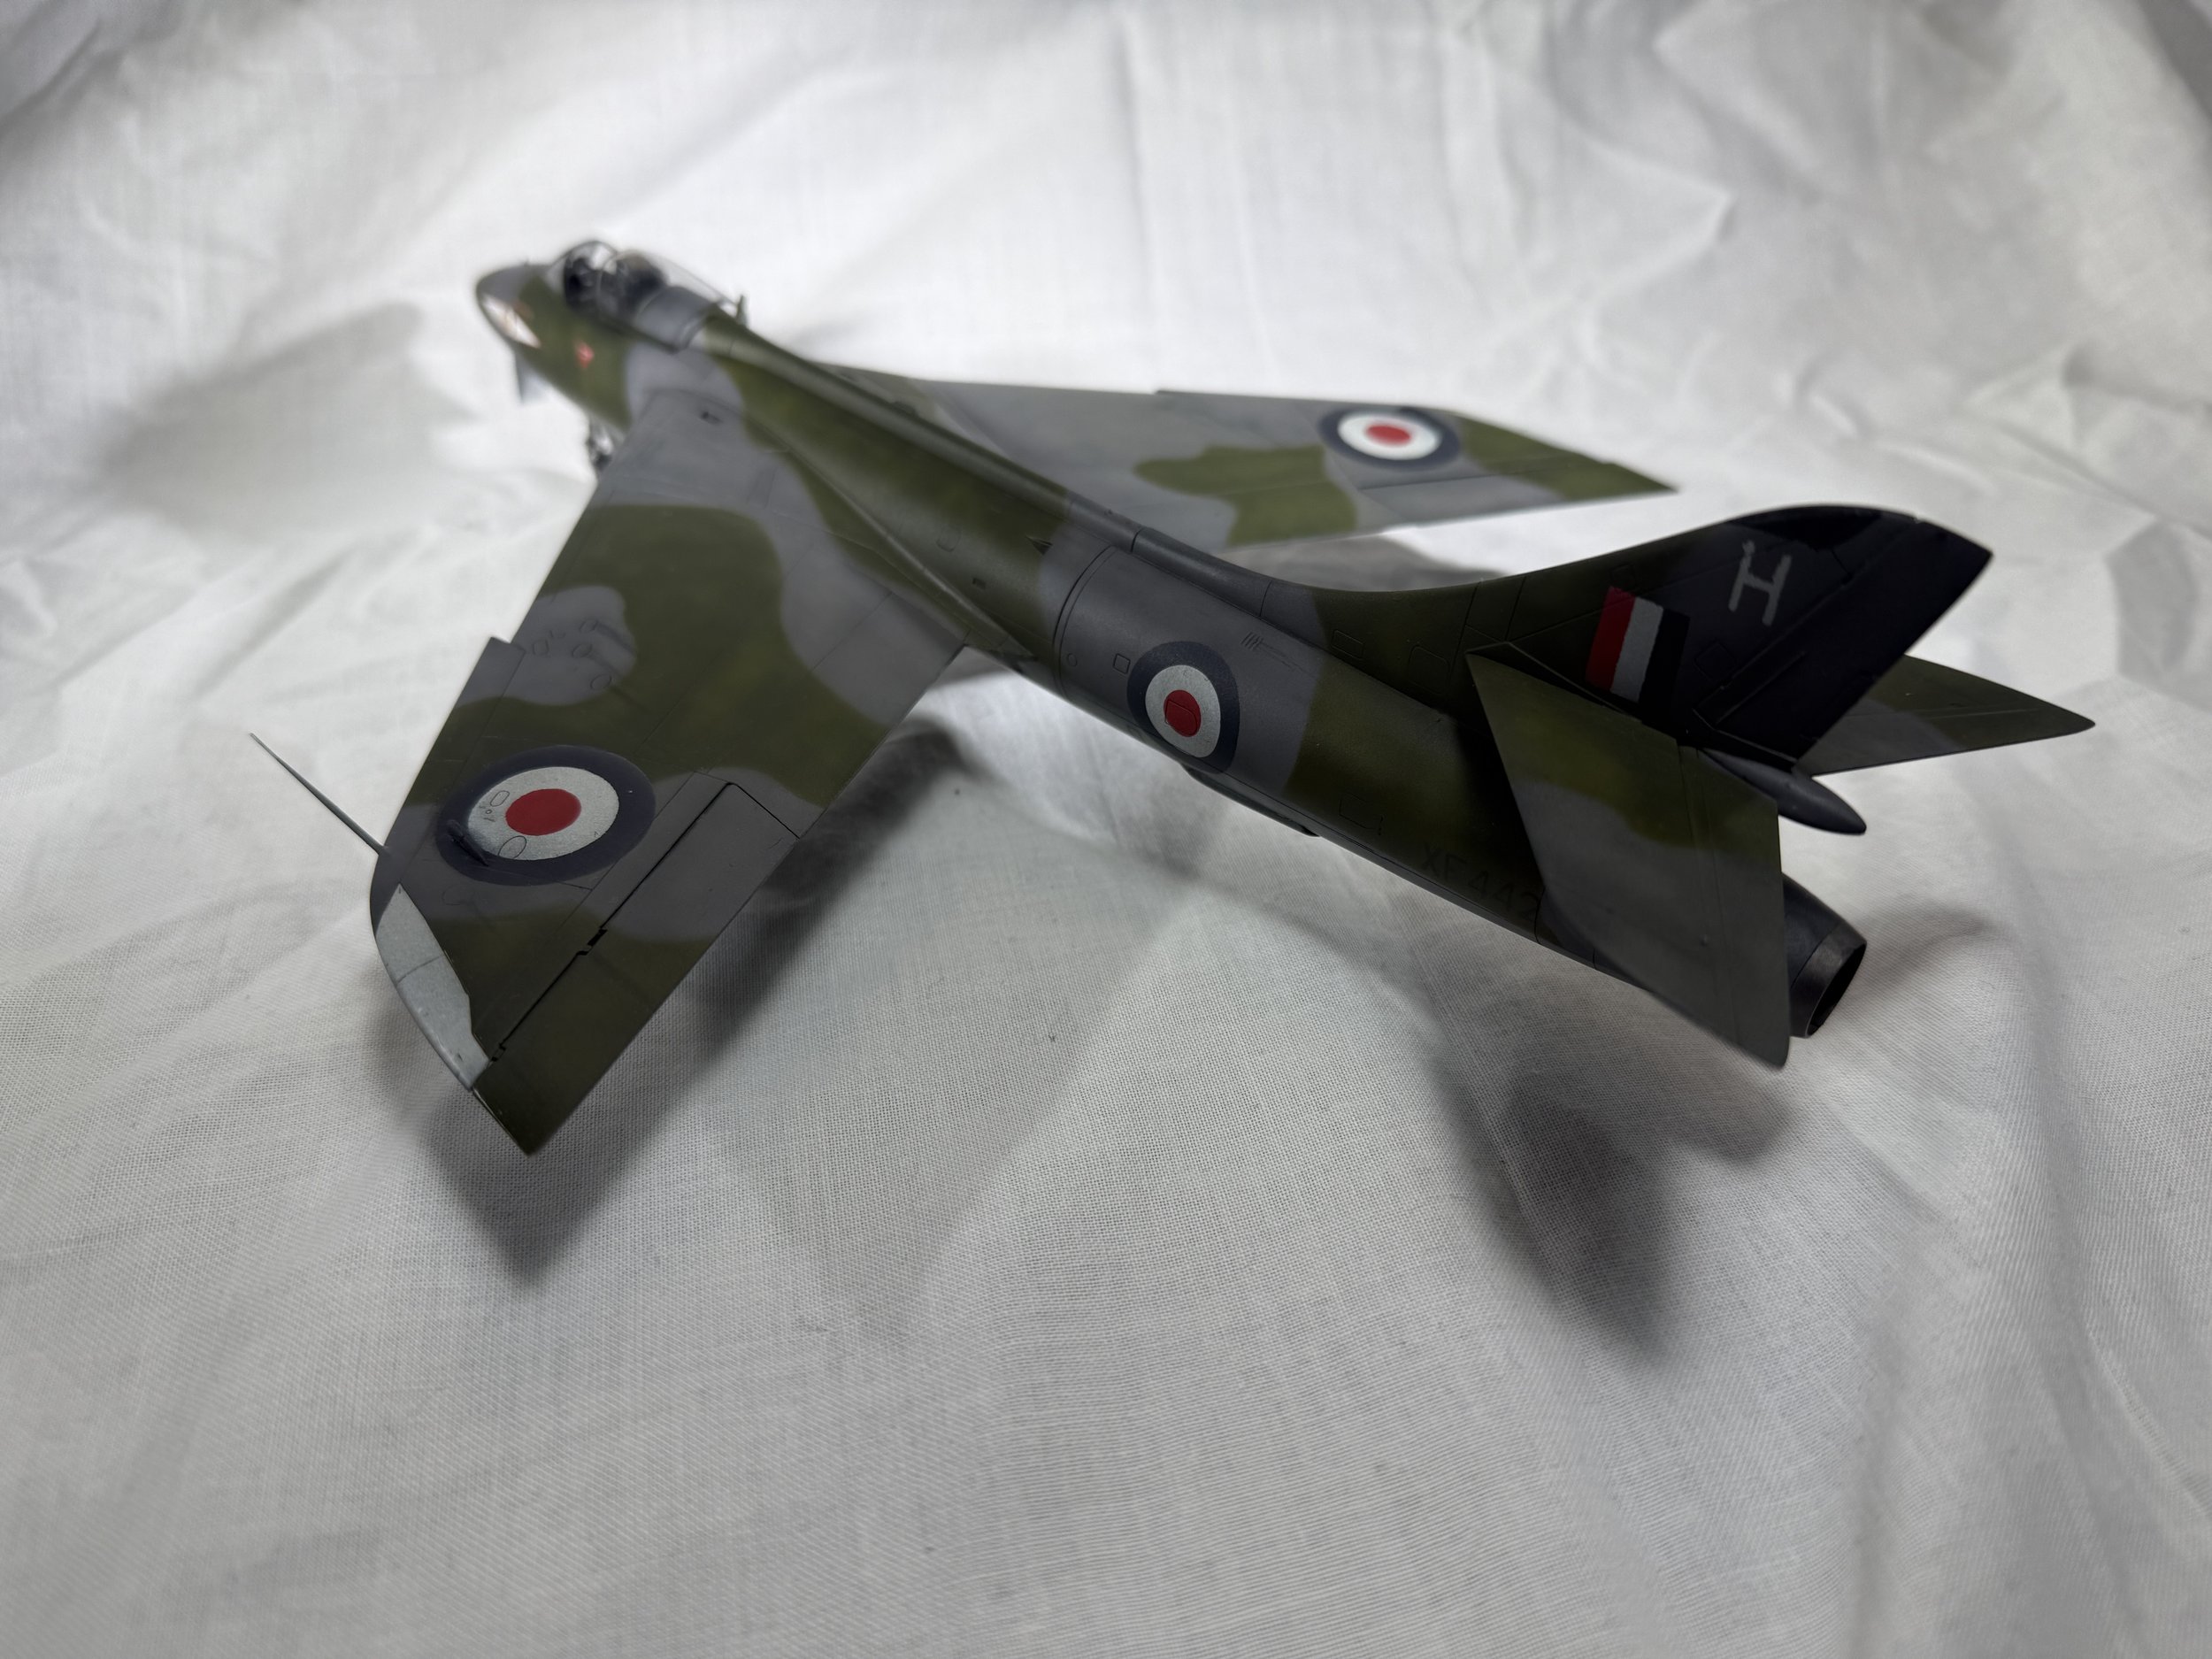
For this build I used a set of The Crafting Well Scale Model Paint Masks. In this set you get the British roundels for the fuselage as well as the upper and lower wing, the numbers for under the wings and the tail flash. The way I do my masking is that I paint my markings before I do the camouflage. Firstly, I place a white down not only for the white parts but also to make the Reds, Blues and Yellows pop a bit more. I then place the masks over the area which I want to keep white. Next, I spray any red before placing a mask over this area and then do the same steps with the blue to complete the British Roundels. Once the roundel colours were painted and masked up, it was time to pre shade.
For the pre-shading I started on the belly of the aircraft, for this I use some brown and lighter tones to highlight central panels which will add contrast when I come to paint the actual camouflage colour. For the camouflage colour I mixed approximately 40% paint to 60% thinner H332. I built up the colour slowly with light layers to cover the pre shading. The next step I lightened my paint mix by adding light colours such as buff or a lighter grey as well as adding more thinner, the mix was then approximately 20% paint to 80% thinner. I used this paint mix to mottle the centre of the panels. Once this was finished, I lighten the paint further with another couple of drops of the lighter colour of choice and again added some more thinner, so this time we're about 10% paint and 90% thinner. I then sprayed this to the centre of the panels’ before dumping that out of the airbrush. I then got the base colour and added some browns into there to make it darker for actual panel lines, over hatches and so forth, once this was completed it was time to mask off the lower part so I could paint the upper camouflage. For this, I used the same process with a pre shading of lighter colours such as yellows before then spraying the grey camo. For this, I again lightened the paint for centre of the panels and then using a darker tone for the panel lines. Using white tack worms to mask off the greys and adding in the green camo colour to the upper and again same process lightening where needed in the centre panel and then darkening on panel lines.
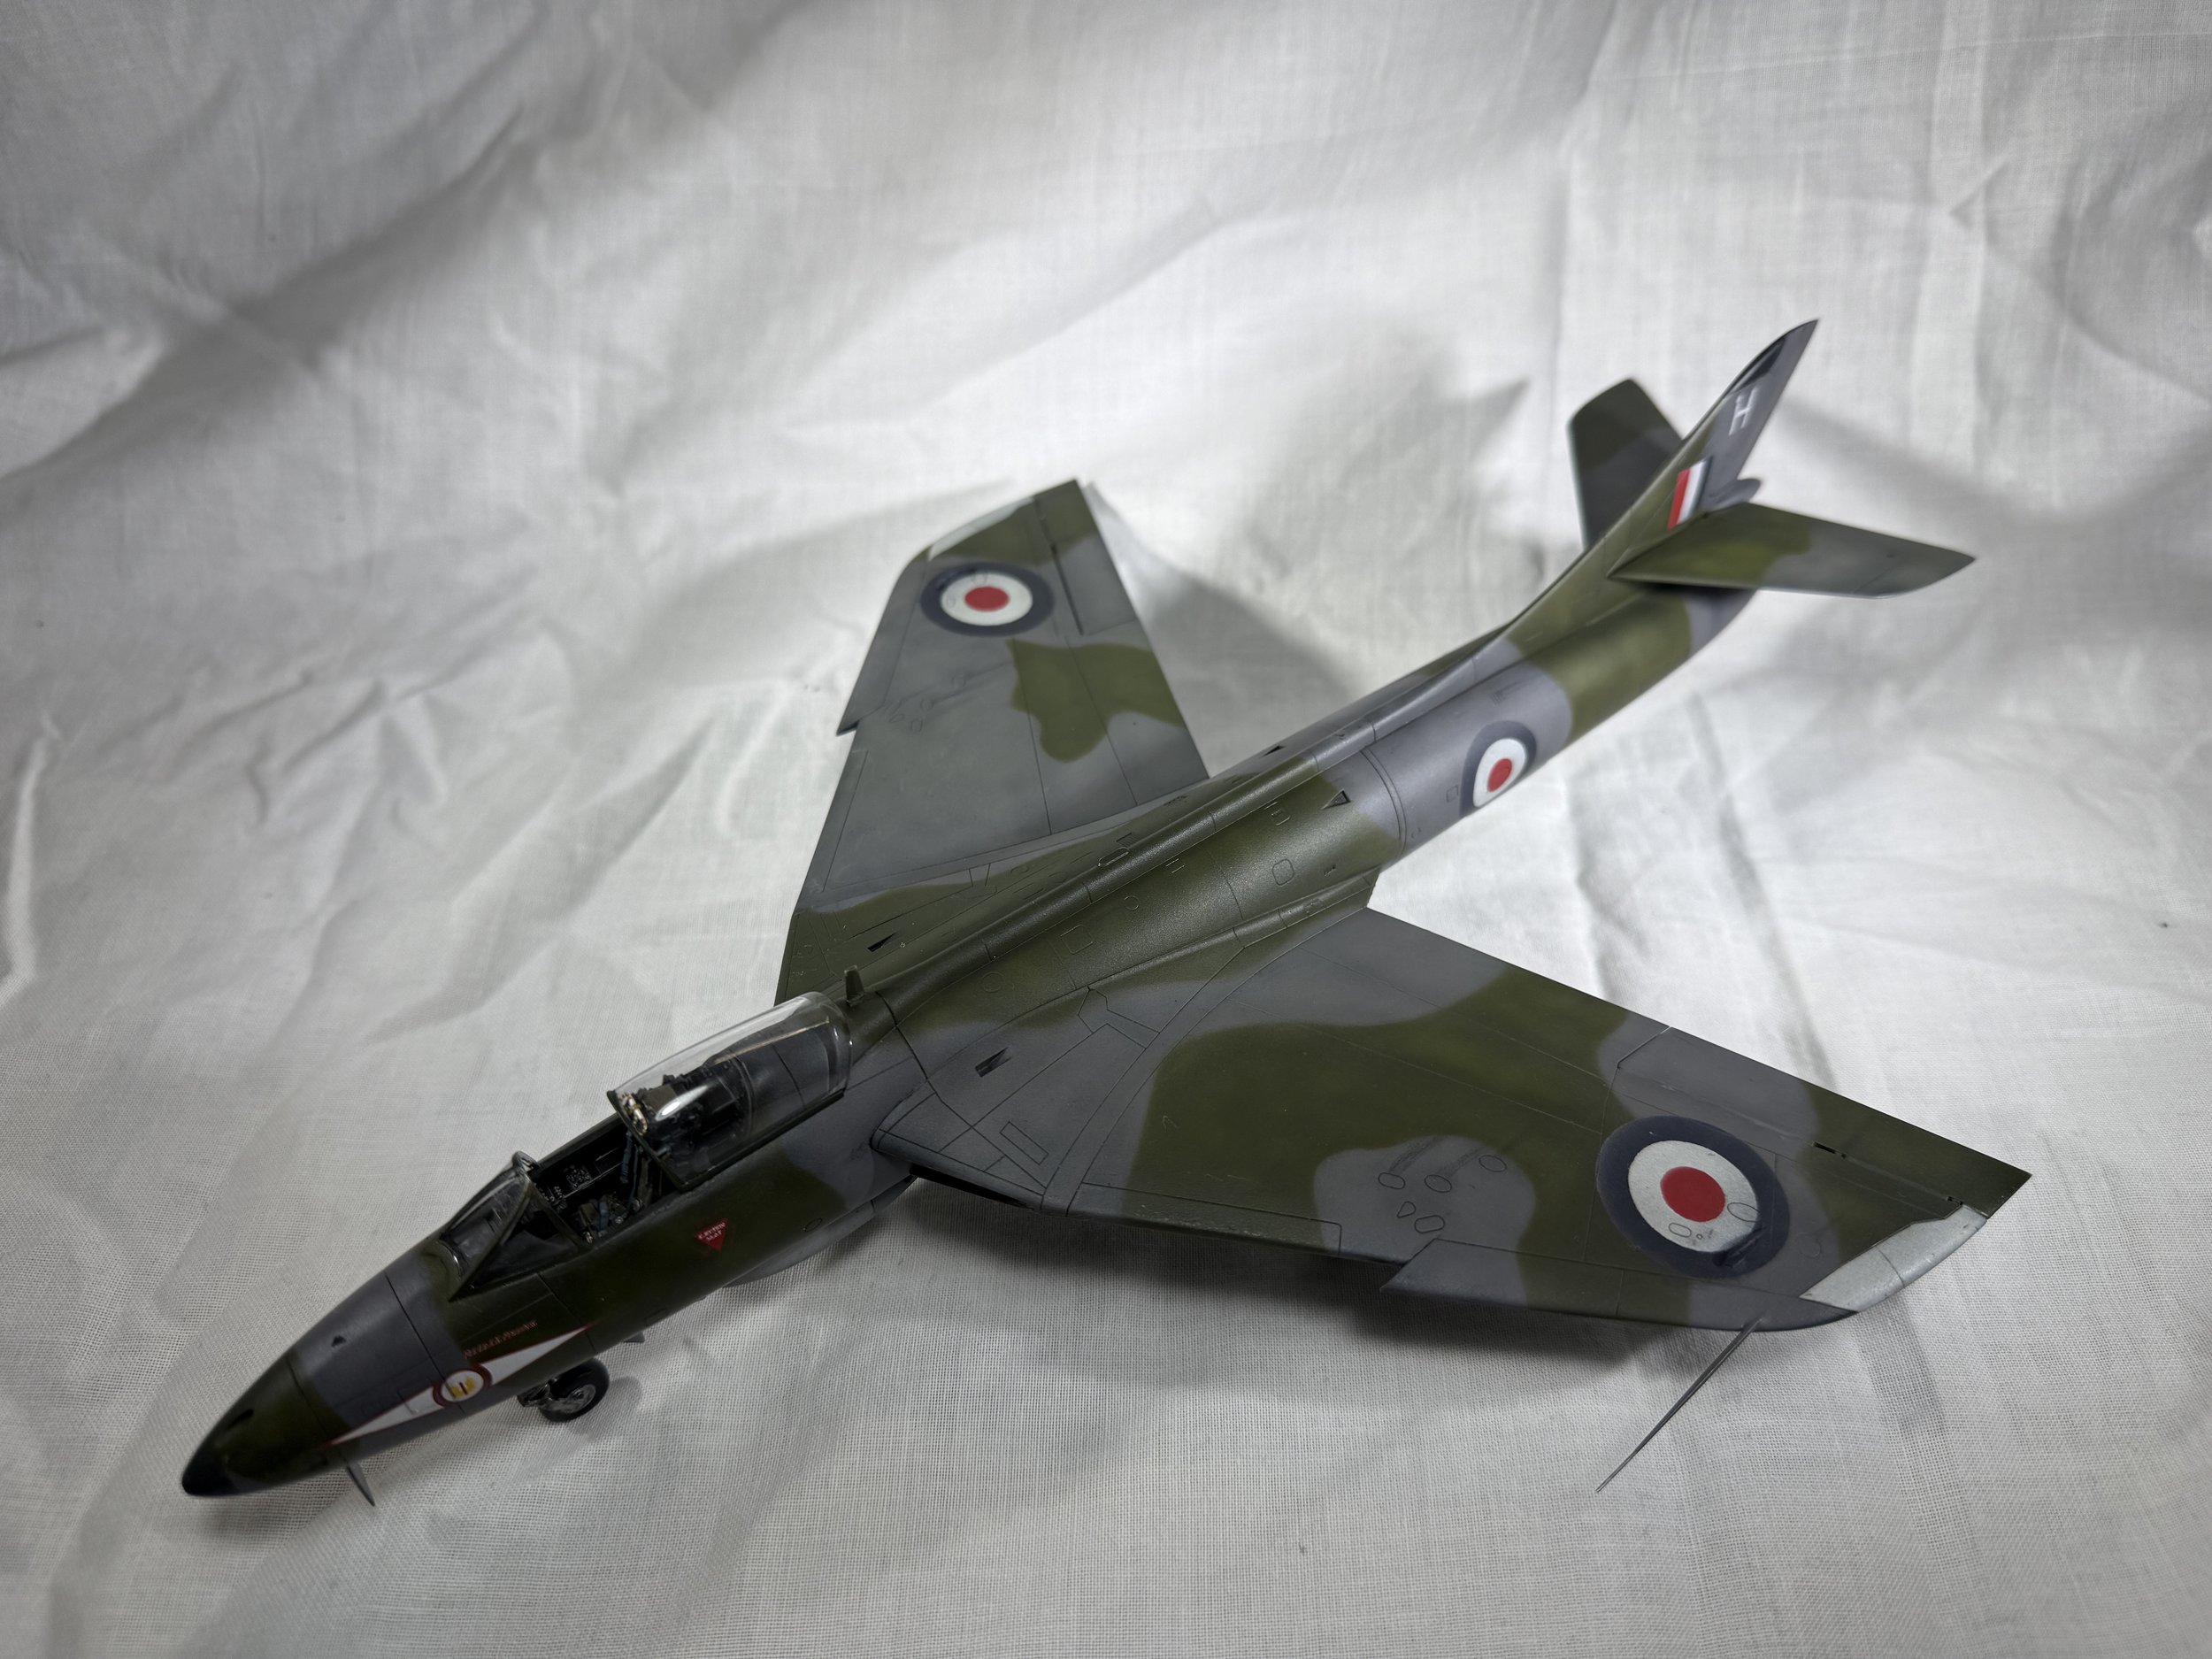
After this was complete it was time to remove the masks, and this is the moment of truth to see whether I've done everything correctly. Peeling away the masks is always a good feeling because you can see the identity of the aircraft coming to life. Once I had removed the masks everything looked great, the markings really stood out and everything seemed to line up really well once this was given a gloss coat I went in with a wash for the panel lines again I use AK interactive oils Starship filth removing the excess wave odourless thinners set that aside for it to dry before I then used a matt coat then I use the oil dot filter again AK interactive oils greens Blues yellows light grey dotted all over and then with a brush damp with odourless thinners dragged this backs to blend these dots into the actual aircraft again leaving that time to dry it was time for VMS's satin varnish which is the first time I've ever used it straight from the bottle straight through my neo airbrush which has a needle size of 0.35 millimetres it's now time to remove the masking from the canopy and I've been added all the wheels and over dangly bits this is what I found out there was not enough weight in the nose so I had to add some ball bearings into the nose wheel Bay to make sure this wasn't a tail sitter and then we are all finished a really enjoyable build though it took me longer than where it should have but on to the next one bye for now.


Model Built and Painted by Nigel Wells from My Modelling World